This article will teach you how to manage recurring and exceptional visits, edit visit details, cancel visits, modify check-in and check-out times, and perform bulk actions.
Understanding Visits
Visit types
The types of visits that can be created in Lookout.
-
Recurring - The visits occur every week, consistently on the same days and time.
-
Exception - These are visits that occur only once and do not repeat.
-
Recurring Visits and Deleted Rules - If a recurring visit disappears, it might be due to its schedule rule being deleted. Note that deleted schedule rules cannot be restored.
-
Exception Handling - Exceptional visits cannot be deleted, but they can be rescheduled, canceled, or reassigned to a different Care Worker.
Visit status
In Lookout, every visit is designated a specific colour scheme to identify its status easily.

When viewing in Scheduling, visits will have a shift casing around them. The casing will be orange if the shift has a warning flagged. Otherwise, it'll be dark blue to signify it's scheduled.

Expanding visit logs
You can now easily and simply see what's behind each visit log change. When you click into a completed visit (green), a side screen will open with all of the visit's full details. There is scrollable information; at the bottom, you will find the Logs section for the visit. Hover your mouse over the log entries to see a quick breakdown of what's behind each visit log.

9-Day Scheduling Window
How Scheduling Works: Lookout operates on a 9-day scheduling window. The system generates visits daily for recurring shifts within this window, and recurring schedules marked as "never-ending" are continually updated. Changes to recurring schedules or the 'week commence' date can impact visit appearances. Visits outside this 9-day window will appear as the scheduling moves forward.
Viewing the roster
Visits can be viewed or added to the roster from a client's membership page, helper profile, or the scheduling dashboard of the care manager.
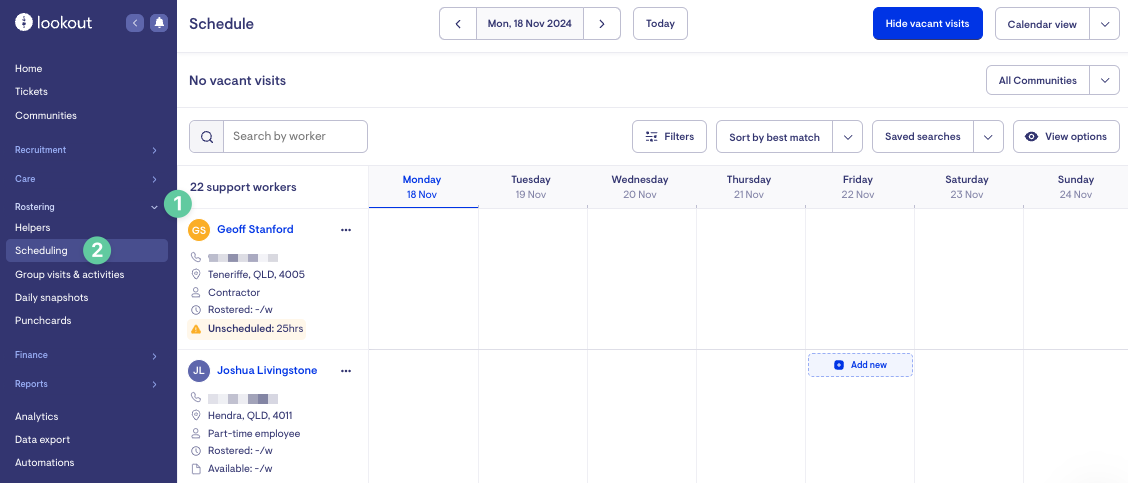
Scheduling Dashboard
To access the schedule page, expand the Rostering dropdown menu from the side navigation and click Scheduling
Member Profile
To access the roster from a membership page, open a specific membership from the Members page.
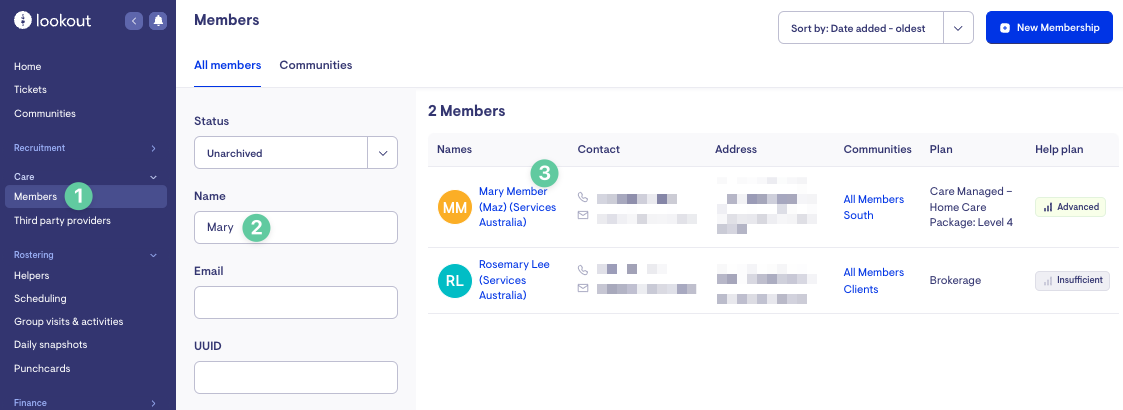
From there, click the Roster tab. To view their upcoming schedule, you can choose between Calendar View and List View.
Helper Profile
To access the roster from a Helper's profile, select a specific helper from the Helpers page.
From there, click the Roster tab. To view their upcoming schedule, you can choose between Calendar View and List View.
Creating Visits
Create a Recurring Visit
The primary way of adding Visits is using a Recurring Visit. These visits occur every week (or based on the selected recurrence frequency), consistently on the same days and times.
Membership page
From the Calendar view, double-click on an empty time slot in the roster calendar and select the Recurring option (rather than Exceptional). Complete the details of the visit and click save.
Helper profile
From the Calendar view, double-click on an empty time slot in the roster calendar and select the Recurring option (rather than Exceptional). Complete the details of the visit and click save.
Scheduling Dashboard
From the Scheduling view, double-click on an empty time slot and select the Exception option (not the Recurring option). After that, fill in the necessary details of the visit and click on the save button.
Create an Exceptional Visit
Membership page
From the Calendar view, double-click on an empty time slot in the roster calendar and select the Exception option (rather than Recurring). Complete the details of the visit and click save.
Helper profile
From the Calendar view, double-click on an empty time slot in the roster calendar and select the Exception option (rather than Recurring). Complete the details of the visit and click save.
Scheduling Dashboard
From the Scheduling view, double-click on an empty time slot and select the Exception option (not the Recurring option). After that, fill in the necessary details of the visit and click on the save button.
Editing Visits
Edit an Exceptional Visit
To edit a visit, locate the specific visit on the calendar view or scheduling dashboard and click on the 'Edit' button.
Edit a Recurring Visit
To edit a schedule rule on a member or care worker profile, simply switch to 'List view' and locate the rule. Then, click on the 'Edit' button to proceed.
To make changes that will take effect in the future, choose a date for the changes to be applied under "Week changes applying".
Please note that any visits scheduled prior to the selected date will not be modified.
Bulk editing visits
If you need to edit several visits, you can do so efficiently by going to the Roster tab for either members or care workers. Instead of using the Calendar view, select List View and locate the visits you want to edit.
You can choose to select each visit individually or simply click the checkbox in the top row to select all of the visits displayed.
Vacant Visits
Visits can be created before a Care Worker (Helper has been chosen. Select the 'Create vacancy' option from the list of Helpers.
Find out more about managing Vacant Visits
Cancelling Visits
Cancelling a Visit
Locate the specific visit on the calendar view or scheduling dashboard and click the 'Cancel' button to cancel a visit.
You will be asked for a reason for your cancellation based on your internal processes and protocols.
Learn more about cancelling visits
Bulk visit cancellation
If you need to cancel several visits, you can do so efficiently by going to the Roster tab for either members or care workers. Instead of using the Calendar view, select List View and locate the visits you want to cancel.
You can select each visit individually or click the checkbox in the top row to select all of the visits displayed. A cancellation reason must be supplied, which is applied to all the bulk cancelled visits in one go.
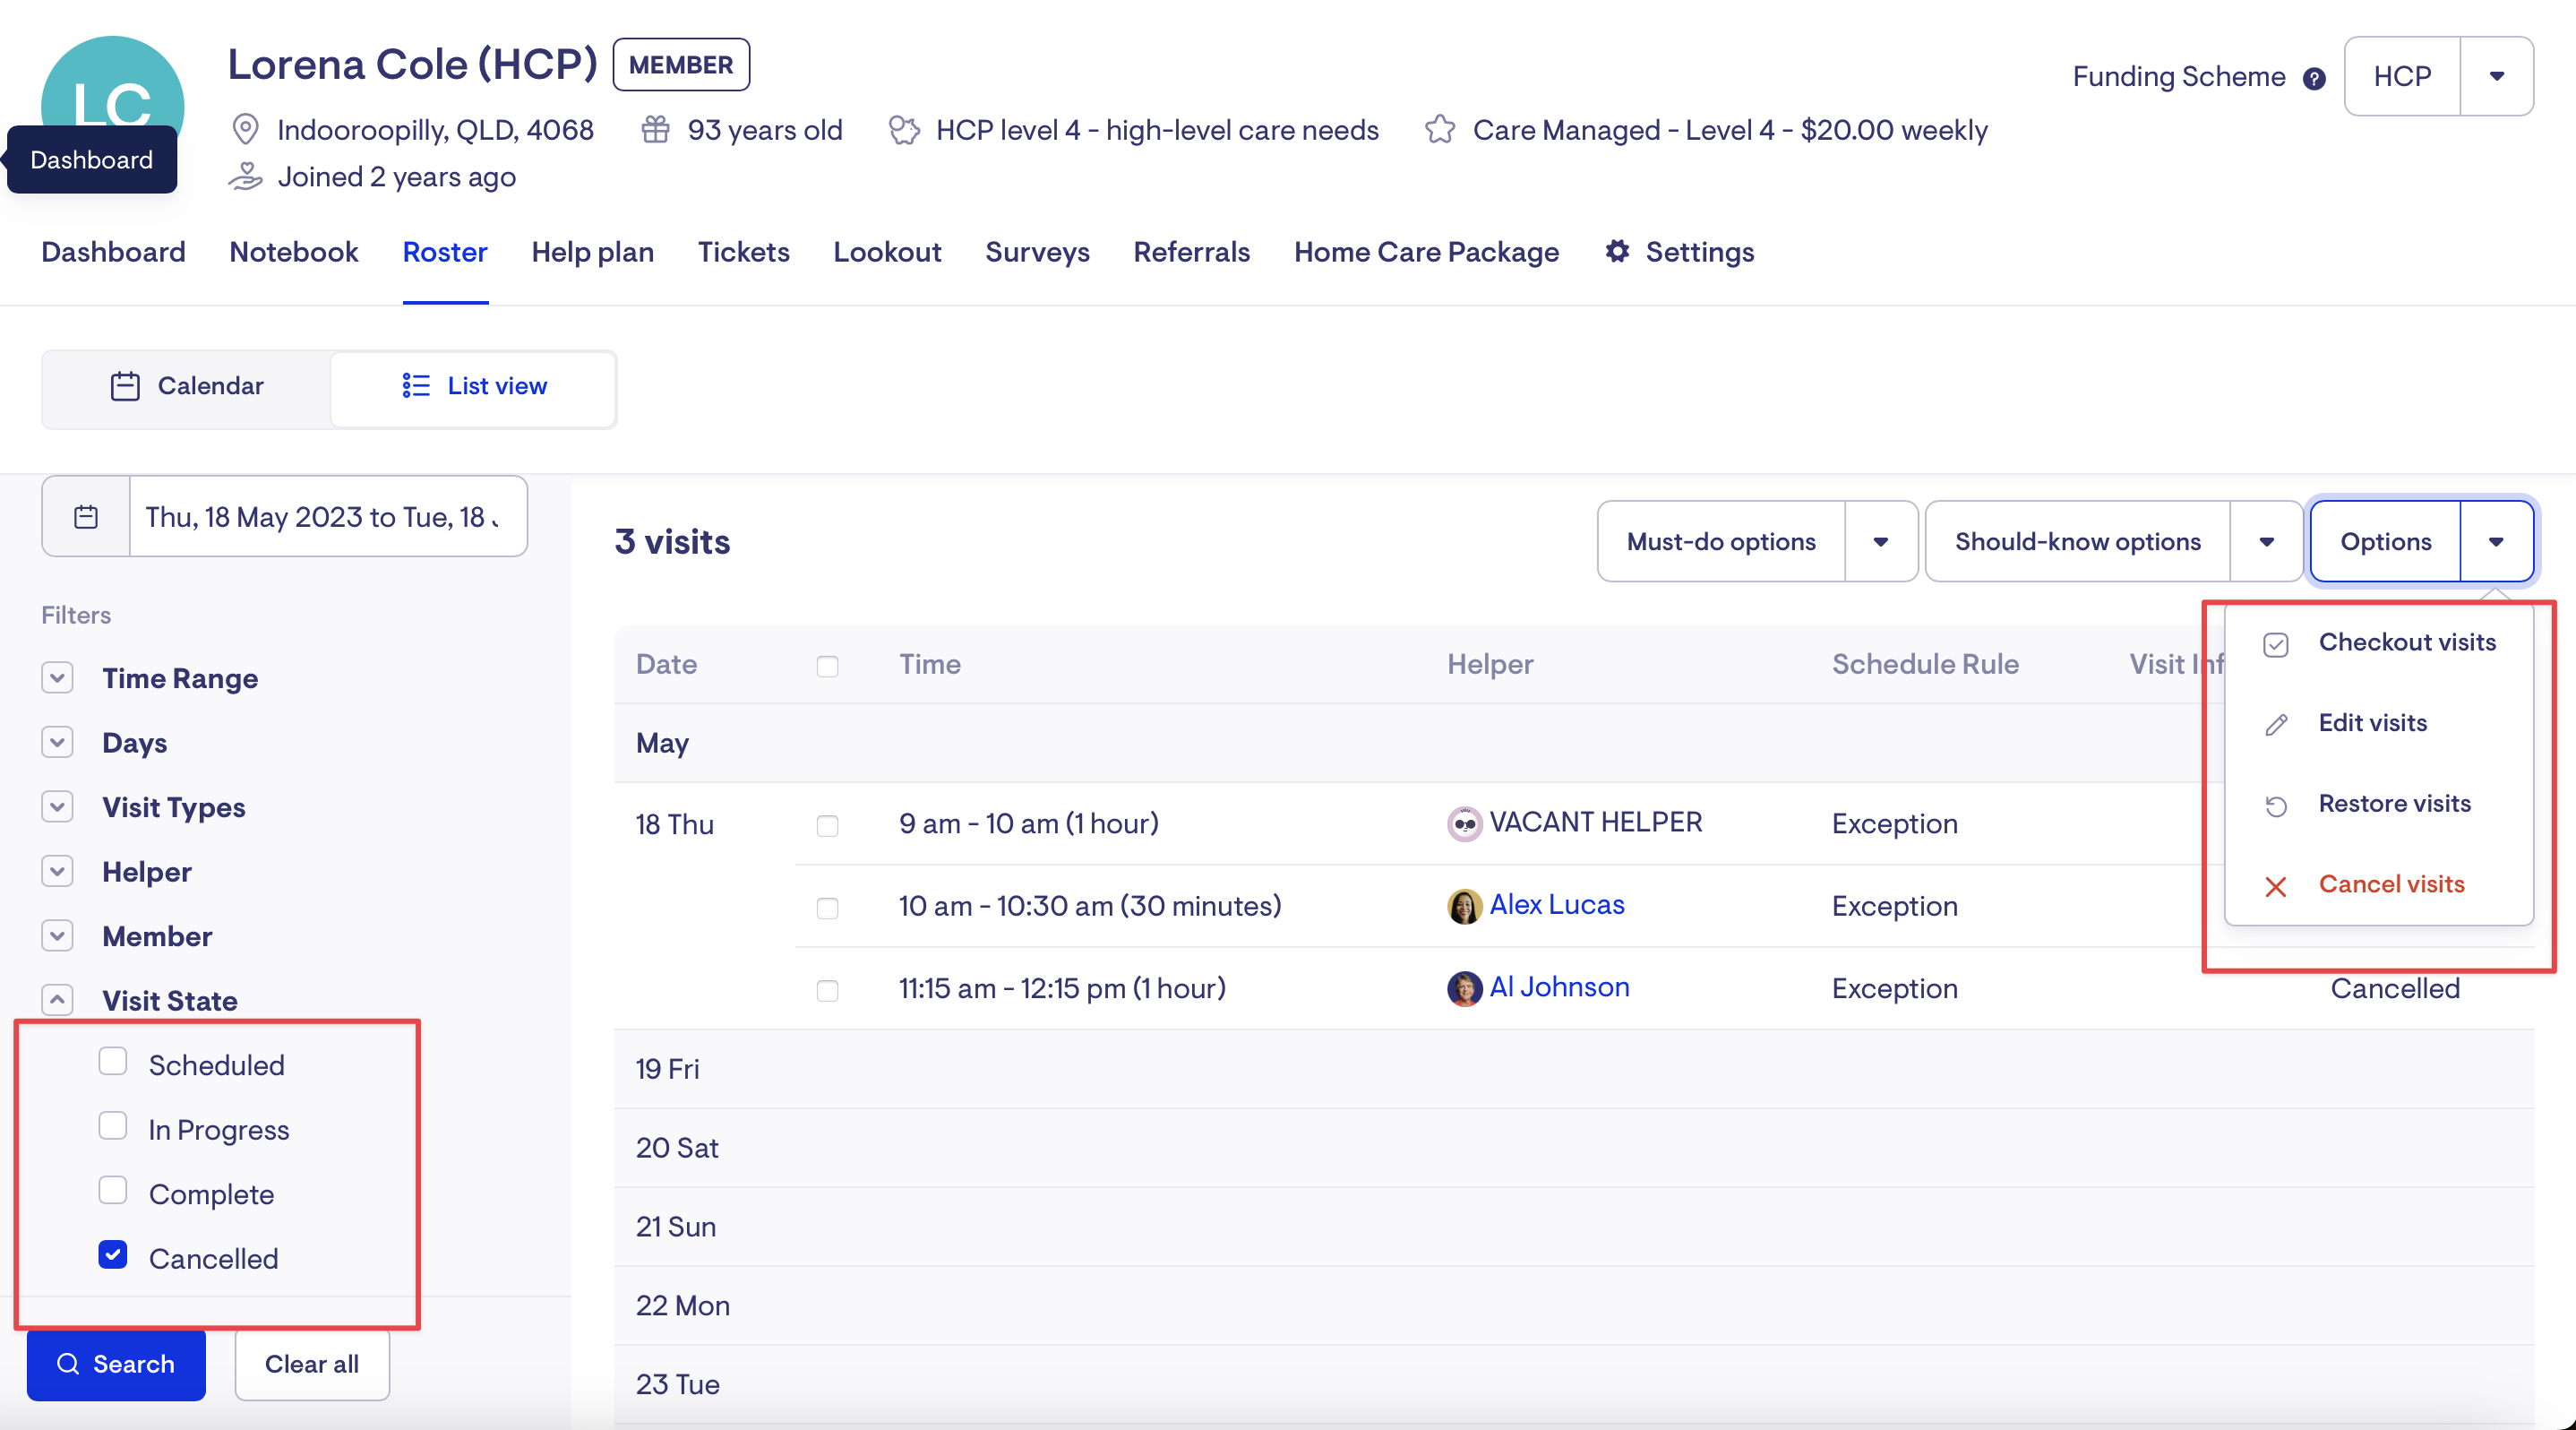
Restore cancelled visits
Cancelled visits can be restored individually or in bulk. This functionality comes in handy when a member is on leave but returns earlier than expected, and you wish to restore the previously cancelled visits.
To locate cancelled visits within a specific date range for a membership, navigate to the List view and apply the appropriate filters. Once you have identified the desired visits, select them and click "Options" followed by "Restore visits".
Acquit & Unacquit visits
Checkout (Acquit)
As the Visit progresses, it is the responsibility of the Care Worker to check in and out. If they fail to do so and you would like to mark the visit as complete, you can click the Checkout option instead of Edit or Cancel.
It is possible to modify the check-in and check-out.
Unacquit (Uncancel, Uncheckout)
A visit can be marked as unacquitted if it has been cancelled or completed. This action will bring the visit back to its scheduled state.
Bulk check-out visits
If you need to check-out several visits, you can do so efficiently by going to the Roster tab for either members or care workers. Instead of using the Calendar view, select List View and locate the visits you want to check-out.
You can select each visit individually or simply click the checkbox in the top row to select all of the visits displayed.
The scheduled start and end times will be used to check-out each visit.
If enabled, the provider travel times, provide travel distances and client transport distance will be set to zero.
FAQs
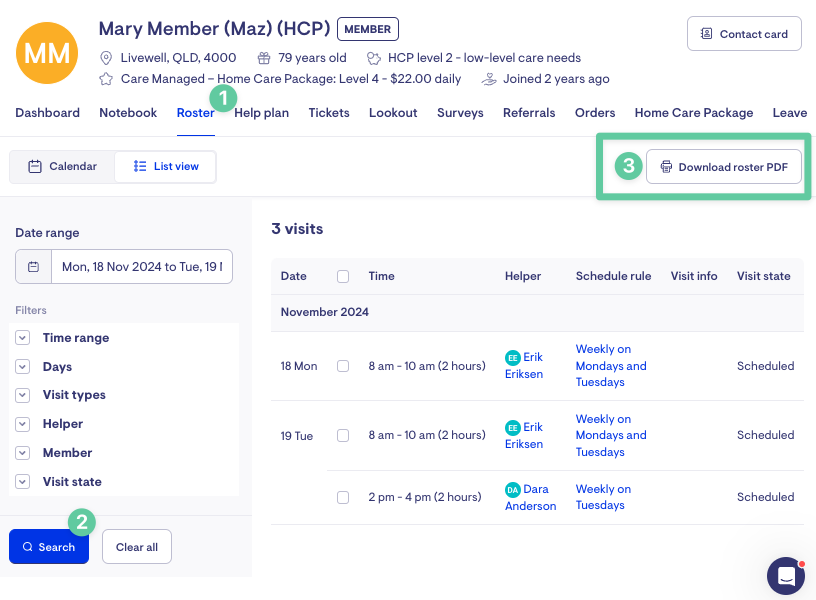
Can I download a PDF copy of a member's roster?
Yes. You can download a PDF of the member's roster. To do this:
-
Open the member's roster page and switch to List View.
-
Apply the required filters, including the date range, visit types, etc.
-
Click the 'Download roster PDF' button.